Saturday, 30 April 2011

Summer Picnic


To celebrate the Royal Wedding yesterday my friends and I set up a picnic in the park.

The park was filled, everyone had the same idea and the atmosphere was fantastic. The sun was shining, a great picnic spread, a glass of pimms in hand, the boys playing footy and at one point I was even showing off my skills!

So, to celebrate all things British and this beautiful sunshine I have compiled a list of my favourite images to help you all enjoy a great picnic in the park!

A beautiful picnic rug and cushions makes the ideal place for relaxing with a glass of your favourite in the summer sun!
This polka dot picnic basket has a wipe clean fully insulated lining to keep food both hot and cold. It comes with a detachable carrier holding:
glasses
plates
cutlery
salt and pepper
cork screw
cheese knife and board
napkins

The detachable carrier fits neatly in the base of the basket and still leaves room for your picnic or it can be carried separately. Perfect for getting everything you need to your destination. 
http://www.notonthehighstreet.com/velvetbrown/product/polka-dot-picnic-basket


The ultimate handmade glass sorbet dish for all your picnic treats and deserts!

http://www.notonthehighstreet.com/sorbetliving/product/coloured-glass-sorbet-dish

Using a cake stand is a great way to display not only cakes but also sandwiches!


http://www.dotcomgiftshop.com/cakestand-regency-3-tier

A British picnic or garden party would not be complete without some bunting!


http://www.dotcomgiftshop.com/bunting

Yesterday was quite windy and this would have been very handy so all our napkins did not fly away! A very practical wicker napkin holder.

http://www.notonthehighstreet.com/velvetbrown/product/napkin_holder

I hope you find some things you like to inspire you to make the most of the British weather and get out there with a good old fashioned picnic!

Follow my blog with bloglovin

Sunday, 24 April 2011

Happy Easter


Easter has finally arrived and that means I can finally eat chocolate.

Some of you may already be aware that for New Year I gave up chocolate until Easter, so this morning I was eagerly awaiting my husband to wake up so I could have my Easter egg. And the lucky girl that I am, I got 2 plus a Lindt bunny!

This morning I was also up early to make a cake for our family day...... And there was nothing more appropriate than a chocolate cake and not just any chocolate cake but a 4 layer White chocolate and dark chocolate cake covered in chocolate icing, White chocolate drizzle and mini eggs!!


So, I would just like to wish you all a very Happy Easter and I hope it is going to be as enjoyable and fattening as mine!!!

Monday, 18 April 2011

Atlantic Health & Spa

Over the past few days I have been extremely good when it comes to keeping to my gym regime. I am sure that all you business owners out there will appreciate that it is hard trying to squeeze in some gym time!
Since our wedding in October, the amazing honeymoon and then Christmas 6 weeks later I have been spoilt when it comes to food and will be the first to admit that I have added a few unwanted pounds, another dilema I am sure you are familiar with. The time has finally come, Spring is here and summer only around the corner, I need to find my bikini body.
My husband is a huge Arsenal supporter so yesterday we were going to spend the afternoon with his mum and dad watching the match, however Jamie's mum had the fantastic idea that we should visit her gym, Atlantic Health and spa for a workout and a swim, some girl time. When we arrived it was actually cheaper to have a weekly pass than a day pass so we went for the weekly! We then proceeded to spend 2.5hrs in the gym, swimming, in the jacuzzi and steam room. Tonight, I have been back and for another 2 hours, in the gym, swimming and revitalizing myself, trying to find happiness with my body again!!!! So, moving onto the point of this blog, I wanted to show you the Atlantic Health and Spa and why I have spent so much time there, if you can exercise in surroundings like this every day wouldn't it make the gym more appealing?

The fact that my dream home is a barn conversion and that this is where I spent my hen day relaxing with family and friends only makes it more special and leaving me wanting to stay there forever! I guess I will have to make do with 1 week only here, then it is back to the regular gym in town!

Pool

Pool and Jacuzzi to the Right

Jacuzzi

Outside

View from the Gym

View of the sunset

All images: http://www.atlantichealthandspa.co.uk/home/

Follow my blog with bloglovin

Saturday, 16 April 2011

How To..... Revive old furniture


I brought a stunning dressing table 6 months ago from http://www.melodymaison.co.uk/ so I had somewhere to get ready on the morning of my wedding but I did not invest in a new chair, instead I used an old dining chair that had seen better days. I have finally found some time and I have painted the chair to give it a new lease of life.

If you have any old furniture, don't give up on it just yet, likewise, don't be scared of buying cheap, old furniture, it still has the ability to be beautiful. And if you are a fan of shabby chic like I am, you will love this look!

1. Sand it down thoroughly using fine sandpaper. If it's unpainted, check to see if it has any knots. If it does, apply a coat of knotting solution over them and allow that to dry.

2. Clean and prime the surface to create the right conditions for painting. Use a little white spirit and a lint-free cloth to clean the surface and remove any dust.

3. Paint it with water-based acrylic paint as this dries quicker and has less odour than solvent-based paints. Apply two coats, letting the first dry before applying the second. Use a large brush for the main surfaces and a smaller one for fiddly areas.

It could not be easier, I love it so much I am now starting on my kitchen chairs! I'll post some pictures when I am done!

Happy painting.

Follow my blog with bloglovin
Images: http://www.limelightphotographic.co.uk/

Tuesday, 12 April 2011

Pretty Easter


Everyone loves Easter, it's sunny, bright, everyone is optimistic. The beautiful colours, tulips and CHOCOLATE! As a New Years resolution I have given up chocolate until Easter in the hope to loose some of the festive weight, it hasn't worked, I have found other yummy foods instead! But I still cannot wait for that sweet, sweet chocolate!

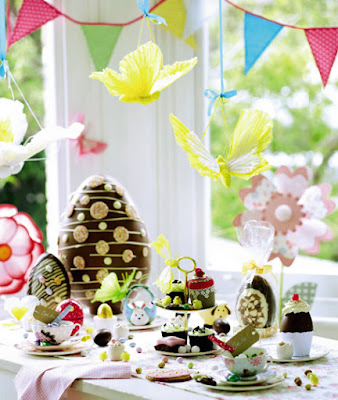
So in the spirit of all things Easter, cakes, family, friends....... bunting, tea parties, pastel colours and everything else pretty I have complied some of my favourite finds to inspire you.

How about using these sunny pots wrapped in ribbon for mini Easter treats at home and on the table!

Perhaps a beautiful centre piece or to welcome guests into your home adorned with more treats?

Another centrepiece around flowers? or hanging in your home and on doors?

Perfect for table names!

Show off flowers in these beautiful coloured jugs!


A refreshing spring drink, perfect for an Easter garden party.

Take a look back at some of my other blogs and learn how to make bunting, tea light holders and Easter eggs!!!  Over the next 2 weeks i'll also be bringing you more entertaining ideas for Easter centre pieces and table names!!!

Follow my blog with bloglovin

Thursday, 7 April 2011

How to make..... An Easter egg


Lets get ready for Easter!!!! Treat your loved ones to a personal homemade Easter egg this year.

It is much easier than you'd think and you can make anything you want, your imagination is your limit.

So, pull your sleeves up and have some fun, and let's face it, anything which involves chocolate is going to be fun! (you don't even have to wait until Easter if you don't want to!)

You will need:
For the Egg:
200g good-quality dark chocolate , plus a little extra for decorating (recommended Green & Black's 82%)

To decorate:
Anything sweet of your choice!
Ribbon , approx 50 cm long

Special Equipment:
2 chocolate egg moulds
Clean flat pastry brush or small paintbrush

1. Break the chocolate into pieces and gently melt in a heatproof bowl over a pan of simmering water, making sure the bowl doesn't touch the water. Stir until smooth, then take off the heat and leave until cool, but still runny. Spoon a quarter of the chocolate into one of the egg moulds and spread thickly over the inside with a flat pastry brush or paintbrush. Be sure to cover the sides well, as this makes it easier to join the edges. Check that the chocolate is even by holding the mould up to the light. Repeat with the other mould. Leave in a cool place to set, then chill for 5 mins. TIP: Putting the egg halves in the fridge once the chocolate has set makes it easier to add another layer of warm chocolate. Don't be tempted to leave the moulds in the fridge any longer than necessary as condensation could cause the chocolate to discolour.

2. Re-warm the remaining chocolate and repeat the process for each side of the mould, saving about 1 tbsp of chocolate for later. Use a knife to scrape away any excess around the rim of the mould to give a clean, straight edge. Turn out each half onto a sheet of greaseproof paper, carefully pulling away the mould until it releases itself.

3. Place one half of the egg on its back (you can create a nest of scrunched greaseproof paper to stop it from rolling about). Warm the reserved chocolate and brush around the edge of the egg. Place the other half on top and press together. You can seal the join further by brushing with a little more chocolate and filling in any jagged edges or holes. Leave in a cool place to set firm.

4. To decorate, use the paintbrush to dab a little chocolate on the backs of the chocolate buttons. Gently press them onto the egg. For the finishing touch, or decorate as you want and finally tie the ribbon around the middle to hide the join.

And as an extra treat..... Why not fill the middle with even more chocolate goodies before you seal the 2 halves together? Show someone how much you love them.

Follow my blog with bloglovin